Determining and documenting the new procedures and protocols that should be followed as dentists and staff head back to work in the post-pandemic environment is no easy task. As a good friend to Seattle Study Club, Dr Ariel Raigrodski was gracious enough to allow us to publish his manual, which includes both his original material and contributions from others. It should not be reprinted or copied — and certainly not taken as gospel — but is offered here as inspiration for Seattle Study Club dentists to create their own protocol manuals. In Dr Raigrodski’s experience, having a manual for staff members to reference has helped reduce fear and restore confidence, leading to a very smooth transition back into practice. It must be emphasized that these protocols are a work in progress, as the reality around us continues to evolve.
Between managing the practice re-opening and bringing a new puppy into the family, Dr Raigrodski is one busy guy, but he nevertheless continues to be available for virtual presentations on esthetic and implant dentistry, CAD/CAM dental technology, and prosthodontic materials. Contact draigrod@comcast.net for more information.
Diplomate of the American Board of Prosthodontics
Lynnwood, WA
Providing a Safe and Healthy Environment for our TEAM and for our PATIENTS
Disclosure: These protocols and measures were adapted specifically to the needs and circumstances of this practice, based on information from the ADA, CDC and numerous webinars. They are not offered as guidance for others.
Thank you to Dr Eduardo Marcuschamer, Periodontist Denver, CO; Dr Jae Seon Kim, Prosthodontist, Seattle, WA; Dr Zach Lowe, Orthodontist, Shoreline, WA; Dr Heidi R. Johnson, Lynnwood, WA; and Seattle Study Club Webinars.
Employee Check-In and Check-Out Protocol
- All employees are to enter the office from the back entrance 30 minutes prior to seeing patients.
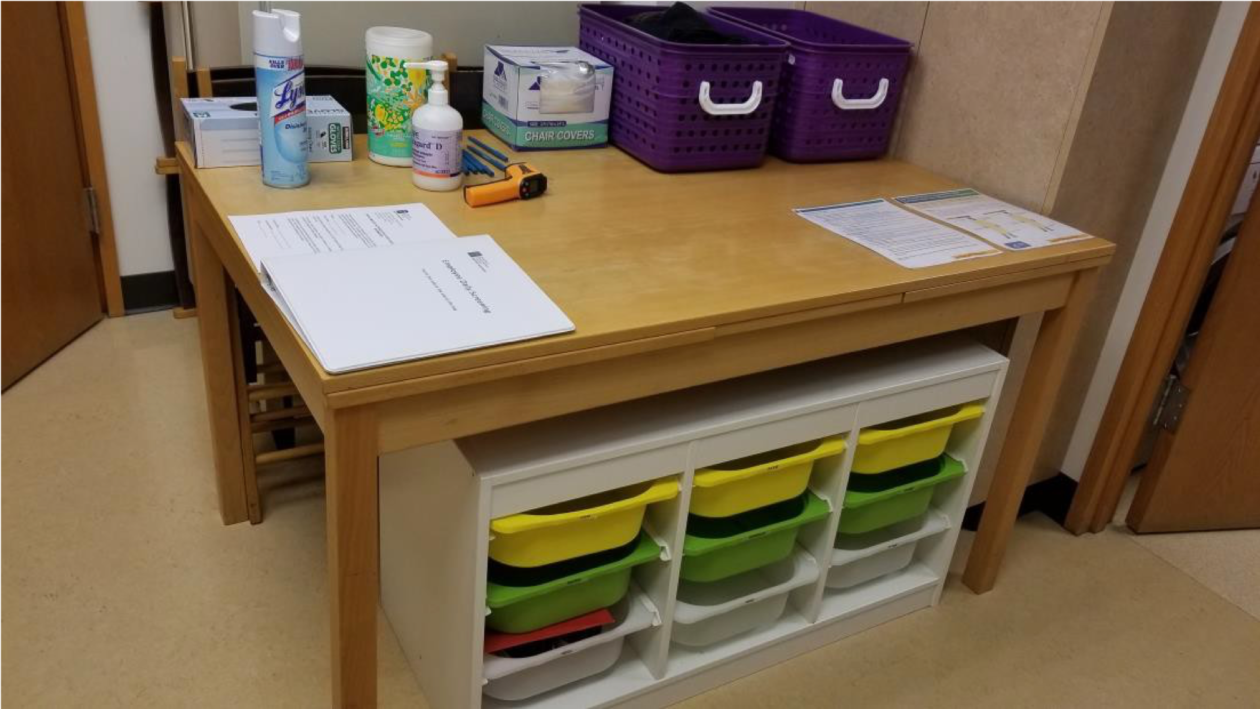
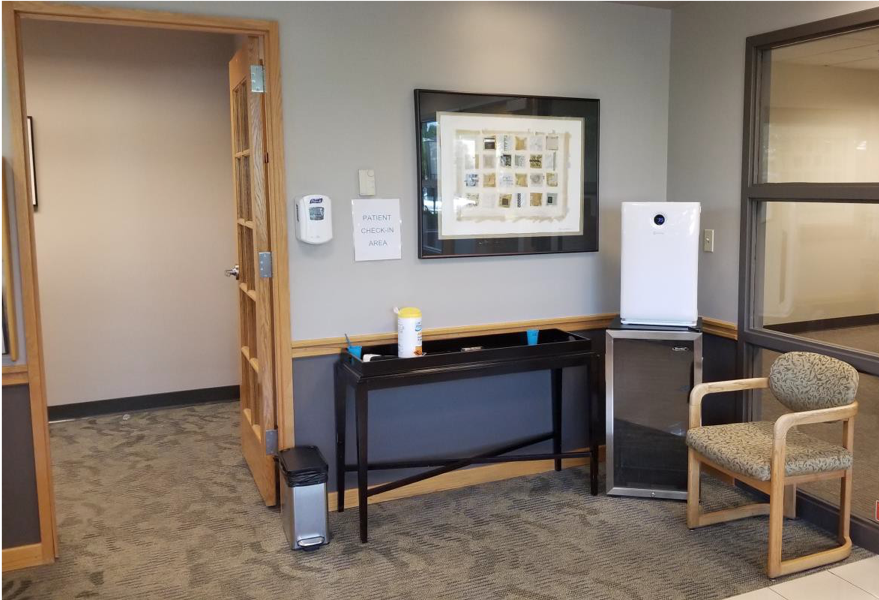
- Employees to use hand sanitizer when entering the office, which will be located on the check-in table at the back entrance. This table will include hand sanitizer, disinfectant wipes, disinfectant spray, a pulse oximeter, and a touchless thermometer.
- Front office staff will be checking employees in with wellness checks:
- Each employee will have a HIPAA form to sign (only signed once on the first day) for the office to take body temperature, oxygen saturation measurement with pulse oximeter, and COVID-19 diagnostic testing (once available for routine use).
- Employees will have their temperature taken at the beginning of each shift and again halfway through their shift by the front office employee on shift.
- Employees will have oxygen saturation level measured at the beginning of each shift.
- Employee wellness logs will be kept by the front office staff (not left in the back check-in area) and will be put in the safe at the end of the day to protect employees’ privacy.
- Employees are to change their clothes as needed in the staff bathroom area only.
- Employees are to have a dedicated pair of shoes for office use only. It is highly recommended to purchase wipeable pair of shoes for the office that can be disinfected easily. Shoes will need to be disinfected at the end of each shift/working day. Each employee will have a dedicated area for the shoes and personal belongings. If employee’s shoes cannot be easily disinfected, employee should wear disposable shoe covers.
- Employees are to bring only necessary items to the office (wallet, keys, phone, medications, etc.). Please leave bulkier items such as purses, bags, backpacks, and jackets at home or in employee’s car.
At the beginning of the working day (after wellness check):
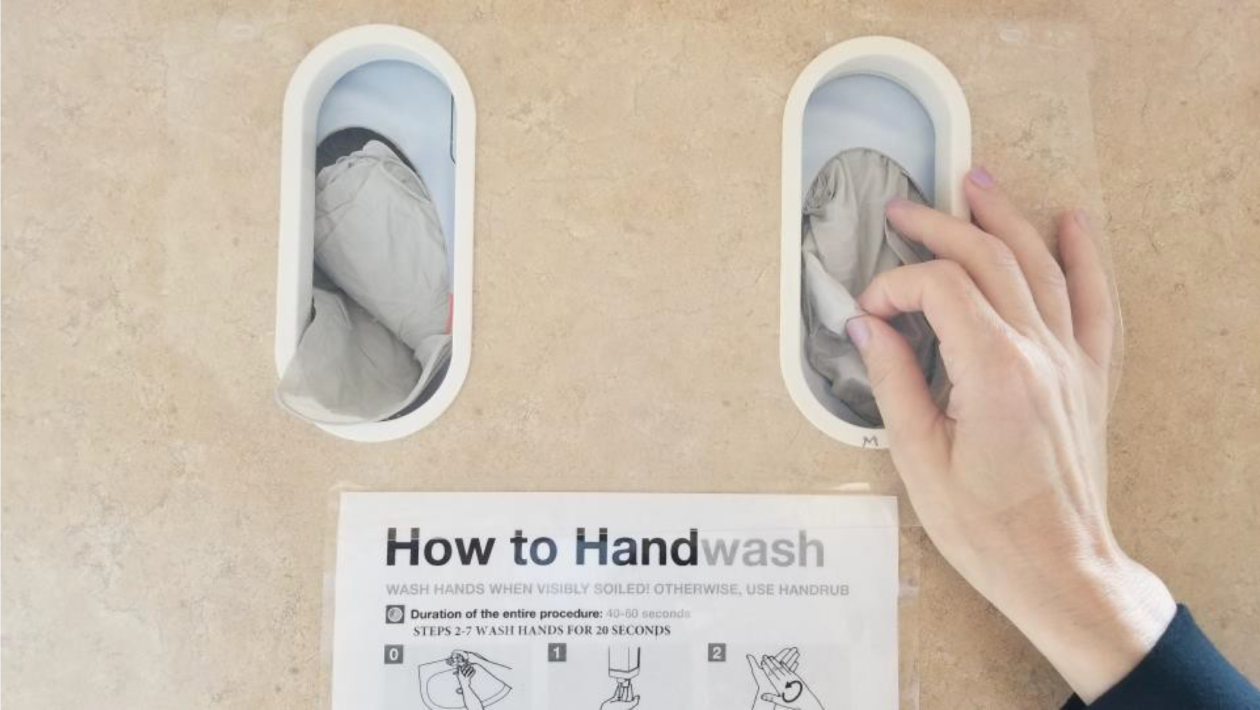
- Wash hands (WHO guidelines provided at each handwashing station).
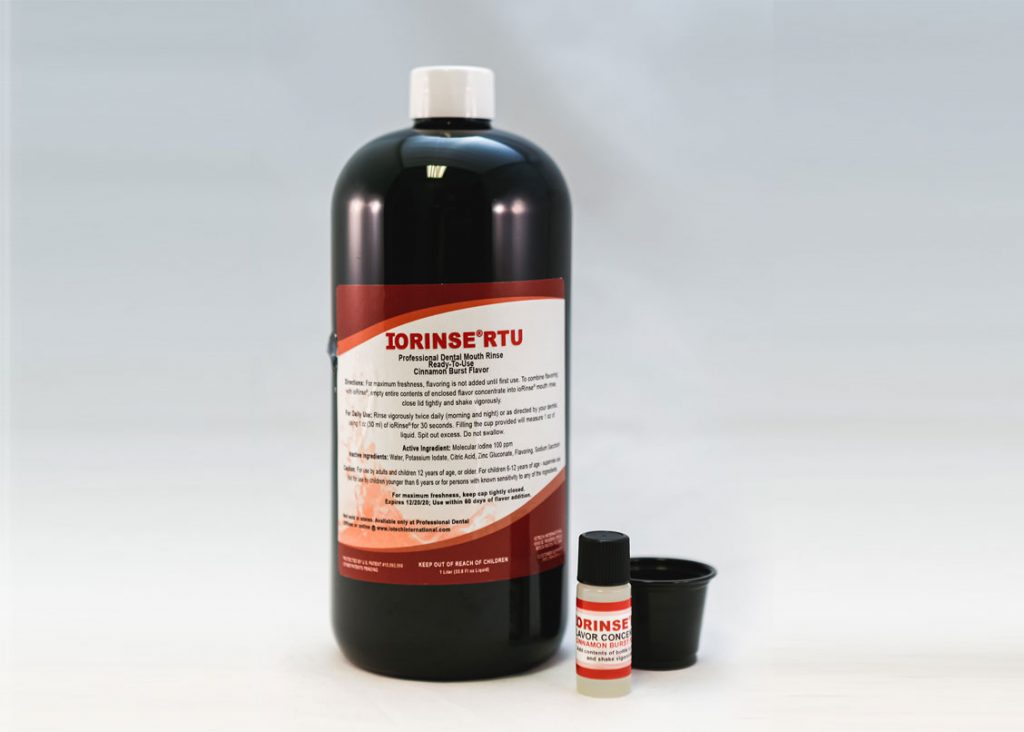
- Rinse with mouth wash provided for the designated time recommended by manufacturer.
- Change clothes as needed and place a surgical head cap.
- Replace shoes with dedicated shoes that can be disinfected (such as “crocs”) or place shoe covers on dedicated shoes that cannot be disinfected (such as cloth or leather shoes).
- Wash hands (WHO guidelines provided at each handwashing station).
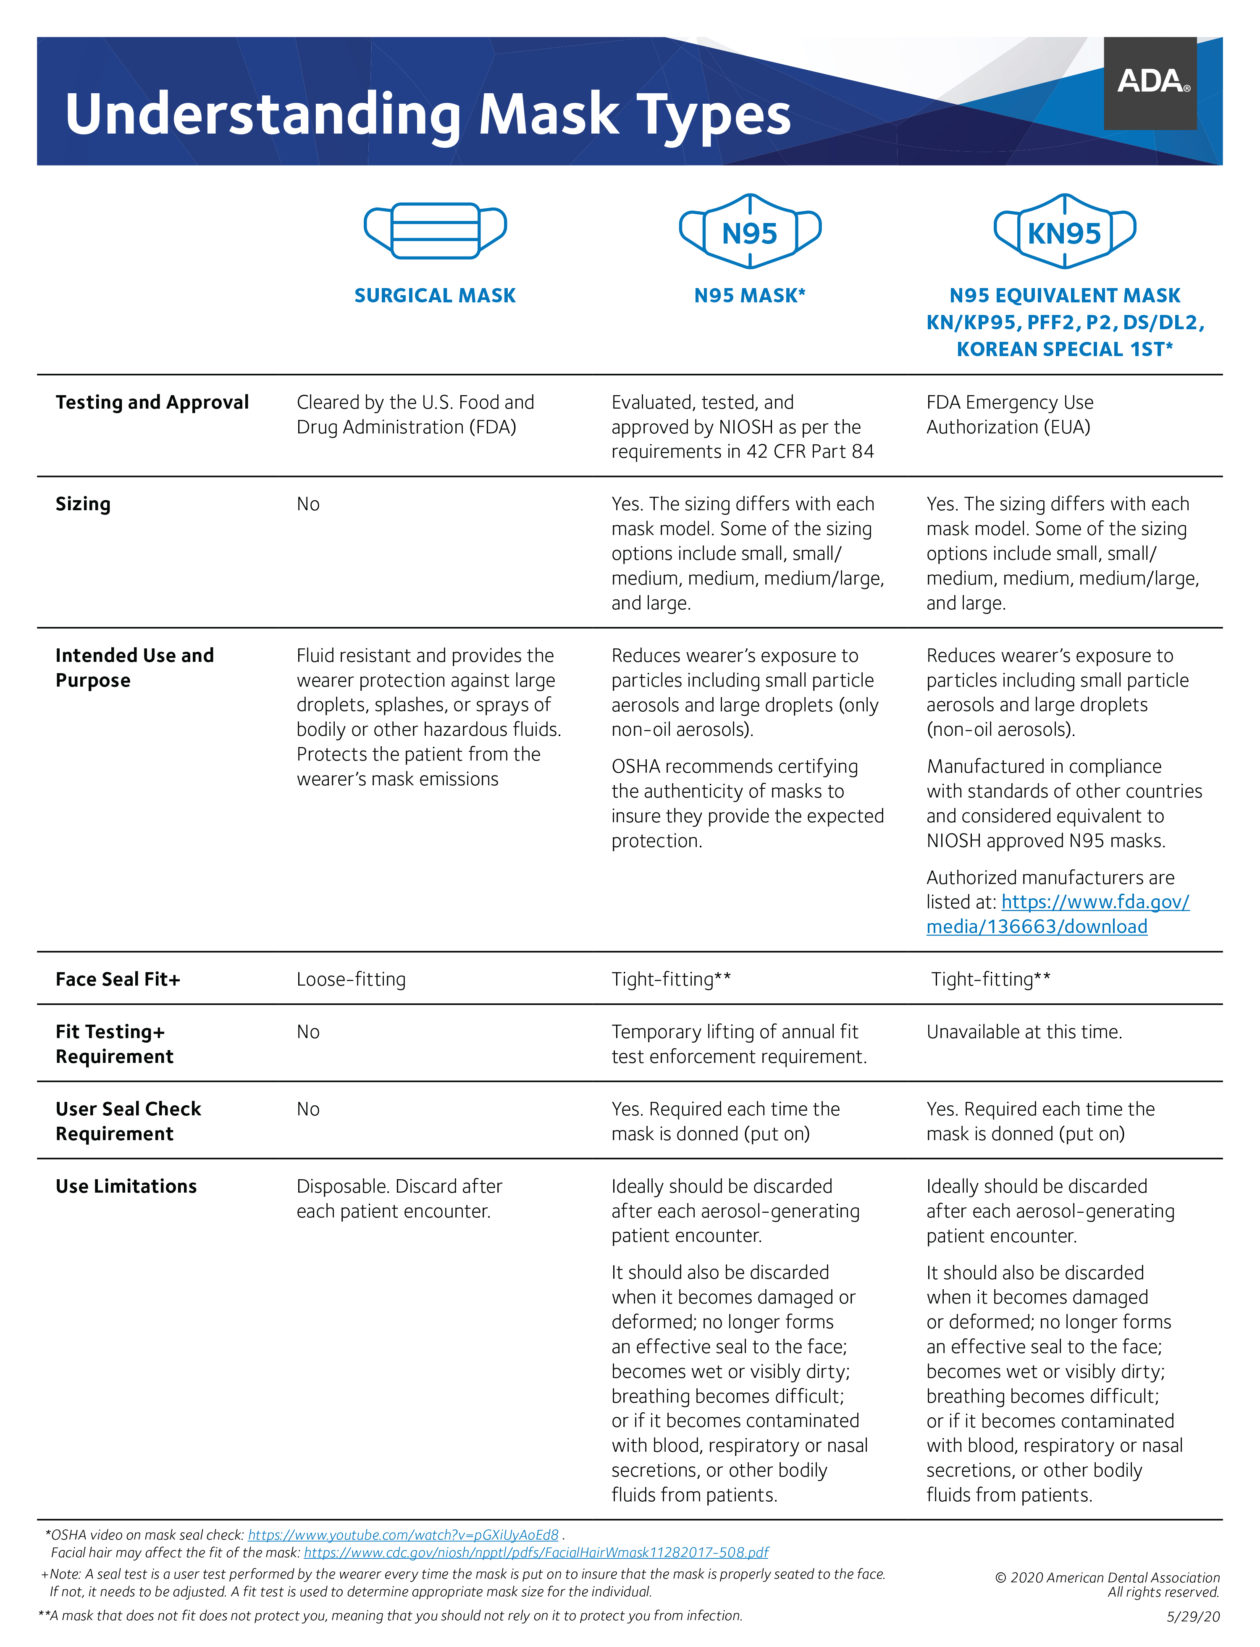
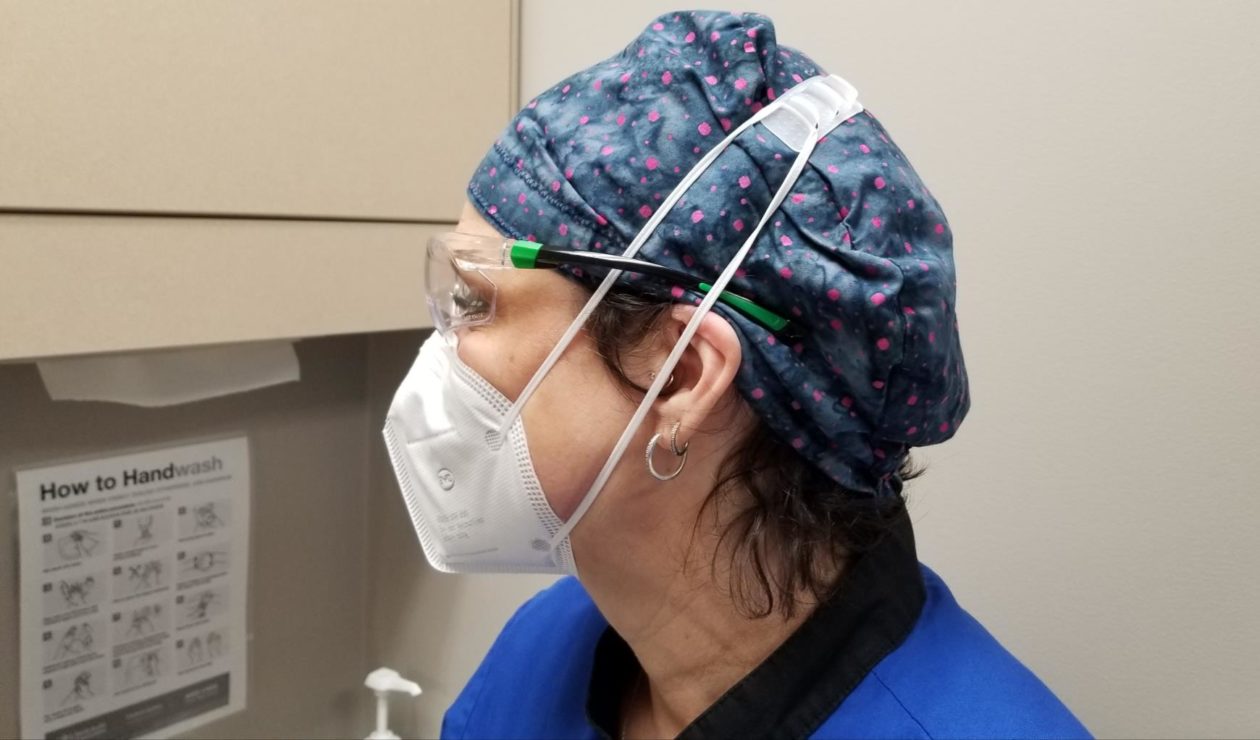
- Place a KN95/ N95 mask and protective eyewear for the day.
At the end of the working day:
- At the end of each shift, employees are to change in the staff bathroom area only and leave all scrubs and lab coats in laundry bins to be laundered. There will be two laundry bins by the washing machine, one for white laundry and one for dark laundry.
- At the end of each shift, employees are to wipe down their shoes with a disinfecting wipe and leave them in their dedicated plastic bin, or remove and discard shoe covers.
- Wash hands (WHO guidelines provided at each handwashing station).
- Employees are to leave the office through the back entrance.
Lunch/Breaks:
Lunch and/or breaks are to be taken outside and employees are to repeat the beginning and end of working day protocols.
Front Office Protocol
At the beginning of the working day (after wellness check):
- Wash hands (WHO guidelines provided at each handwashing station).
- Rinse with mouth wash provided for the designated time recommended by manufacturer.
- Change clothes as needed.
- Replace shoes/place shoe covers.
- Wash hands (WHO guidelines provided at each handwashing station).
- Place a KN95/N95 mask and protective eyewear for the day.
Front office staff will sanitize the staff/back room area including the employee check-in area prior to employee check-in. Wear gloves while sanitizing surfaces and dispose of gloves afterwards.
Front office staff will sanitize the waiting room area including the patient check-in area and the front office counter and working area at a minimum of once per hour. This includes:
- Front office door handles
- Front office counter
- Front counter and working area (including computer keyboards and phones)
- Patient check-in (ensuring used pens are removed and disinfected for reuse)
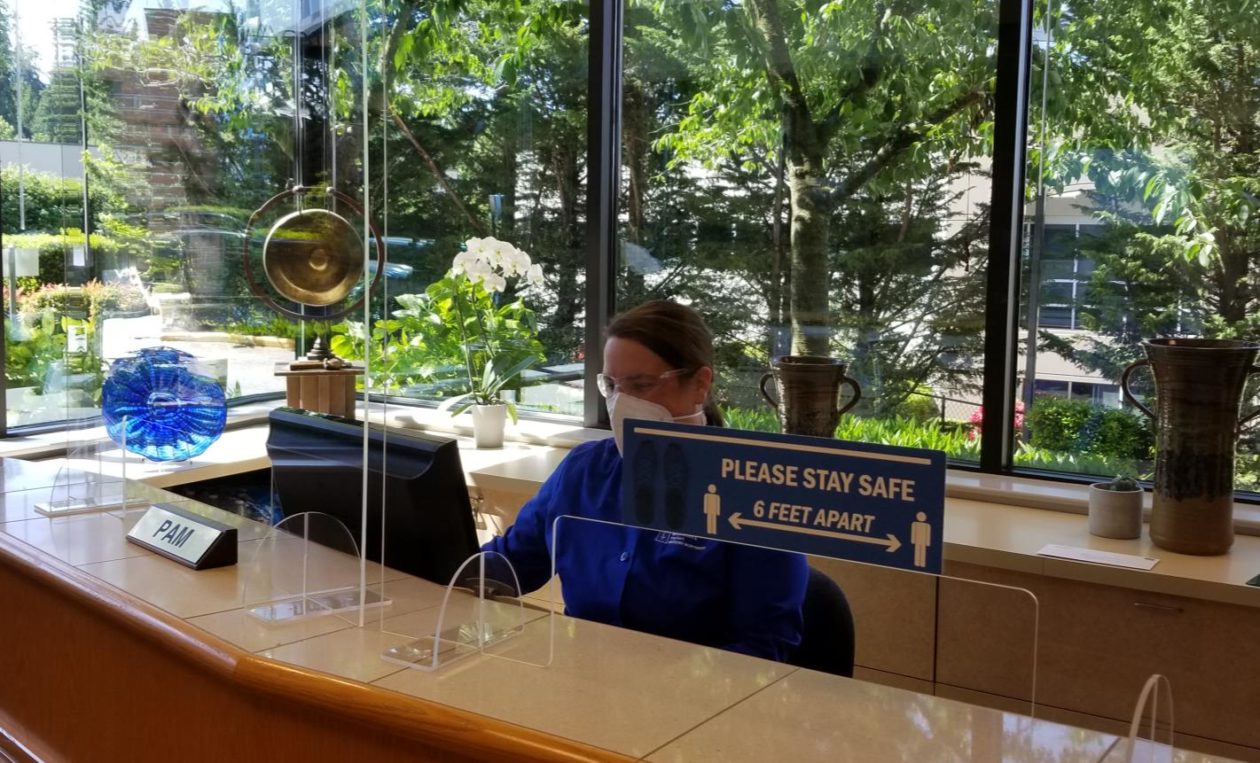
- Sneeze guards
Front office will limit access of the office to visitors. Only scheduled patients are allowed in the office with the exception of a parent or guardian to a patient who is a minor, or a caregiver to a patient with a disability or cognitive limitations. If the patient is accompanied by a parent, guardian, or caregiver, they will be screened as well as the patient upon entering.
We will also stagger appointments — hygiene on the hour and docs on the half hour — to reduce patient traffic. We will be adding some evening shifts for the same reason.
Delivery drivers will not be allowed in the office. A sign will be posted at the front and back doors asking to leave packages at the front door only if they can make contact with the front office staff. All packages received will be brought to the waiting area away from the patient check-in area until disinfected with the ULV fogger at the end of the day or as needed.
Patient Check-In and Check-Out Protocol
- Patient wellness screenings will be done the over the phone prior to the patient’s appointment. This form is to be scanned into Eaglesoft after the initial screening.
- Patients will be asked to stay in their vehicle and wait for a phone call prior to entering the office to limit contact and support social distancing. Patients will be informed that they should use the building’s bathroom, if needed, before entering the practice because our patient bathroom is closed in an effort to enhance sanitation in the office.
- Patients will be asked to arrive at the office wearing a mask or face covering.
- When a patient arrives to the office, the front office staff will screen the patient by:
- Taking their temperature.
- Measuring their oxygen saturation level using a pulse oximeter for oxygen saturation > 92% (patient to be seated during).
- Having the patient complete a Patient Wellness Form.
- Having the patient sign a COVID-19 Treatment Consent Form.
- Writing the patient’s temperature and pulse oximeter reading on a label and having the patient place it on their shirt or jacket.
- Scanning both the wellness form and the consent form into smart docs in Eaglesoft.
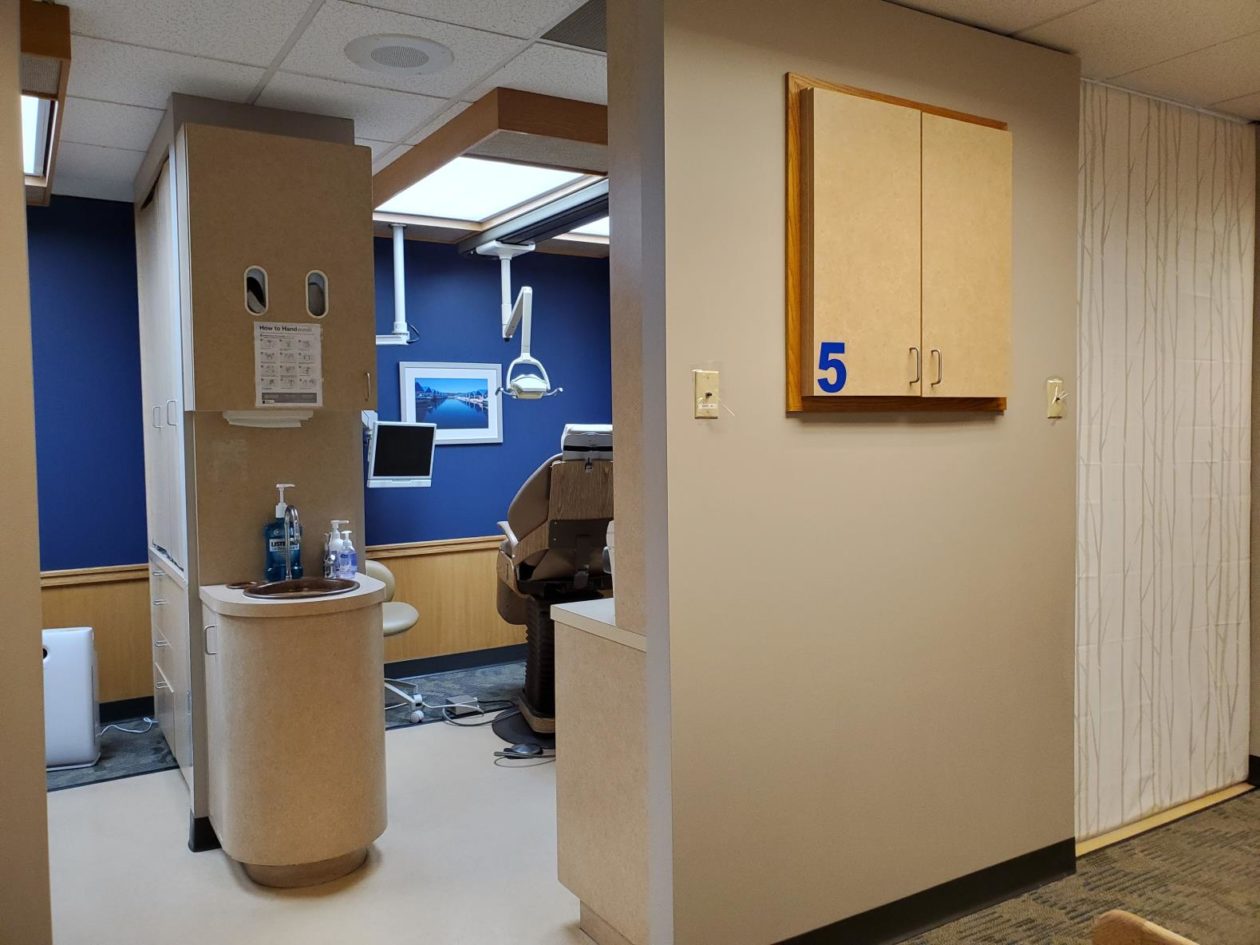
- Patients who pass the wellness screening will then be asked to walk themselves to the operatory they are assigned to. Each operatory has an assigned number marked with a sticker outside the room. The assistant, hygienist or doctor will be waiting in the operatory for the patient. Patients will be seated in every other operatory and there will be staggered start times for procedures.
- If a patient does not pass the wellness screening, they will be asked to leave the office and will need to reschedule their appointment when appropriate.
- At the end of a patient’s appointment they will escort themselves out of the office. Front office will communicate with the assistant in the operatory as to when “the coast is clear” so the patient can leave safely without encountering an incoming patient. They will not stop at the front for scheduling or payment as this will be taken care of over the phone either prior or post appointment. Hygienists are strongly encouraged to preschedule their patients from the operatory prior to the patient leaving if the patient wishes to do so.
Sterilization Room Protocol
Instrument processing:
- Donning appropriate PPE (per CDC/ADA guidelines located in staff lounge): Mask (KN95/95 and a surgical mask on top), protective eyewear (goggles and face shield), gloves and then utility gloves. Utility gloves are to be worn whenever handling contaminated instruments. Utility gloves are located at the sink in the sterilization area.
- Using holding solution: Place instruments that can’t be cleaned soon after use in a holding solution of detergent or enzymatic cleaning solution until they can be cleaned.
- Cleaning: Place instruments in ultrasonic for a minimum of 10 minutes (ultrasonic lid to always be on when running). Check instruments to make sure any remaining blood, body fluids and other visible debris are removed, thereby allowing the sterilizing or disinfecting agent to contact all instrument surfaces and crevices.
- Preparing and packing: After cleaning, inspect the instruments, devices and other processing supplies, assemble them into sets or trays, and then wrap, package or place them in container system for heat sterilization. Hinged instruments and devices are processed in an open and unlocked position. Always wrap instruments or place them in container before sterilization if they are not going to be used immediately. Seal all sterilization bags. An external chemical indicator (e.g., chemical indicator tape) is placed on the outside of the container when the internal indicator cannot be seen from outside the package.
- Cold sterilization: Remove all debris from heat sensitive instruments, devices, and other processing supplies. Make sure they are fully immersed in cold sterilization solution. Do not remove instruments until the next day. Instruments are rinsed with water after removal from the container to remove toxic and irritating residues. Instruments are dried with sterile towels. Instruments are bagged or otherwise protected to maintain the sterile process.
- Sorting sterile and clean patient care items: Use closed or covered cabinets to store dental supplies and instruments to ensure that sterile packets are kept away from contaminants. Never store dental supplies and instruments under sinks or in other locations where they can become wet.
Opening and Closing Operatories
Opening operatories:
- After employee check in, wash hands, don N95/KN95 mask, lab coat and protective eyewear.
- Fill water reservoir bottle and place 1 waterline maintenance tablet.
- Restorative uses distilled water only
- Hygiene uses tap water.
- Turn on delivery system.
- Turn on composite warmer.
- Clean/spray/wipe all surfaces.
- Turn on air purifiers.
- Stock rooms as needed (chairside assistant will be unable to leave room).
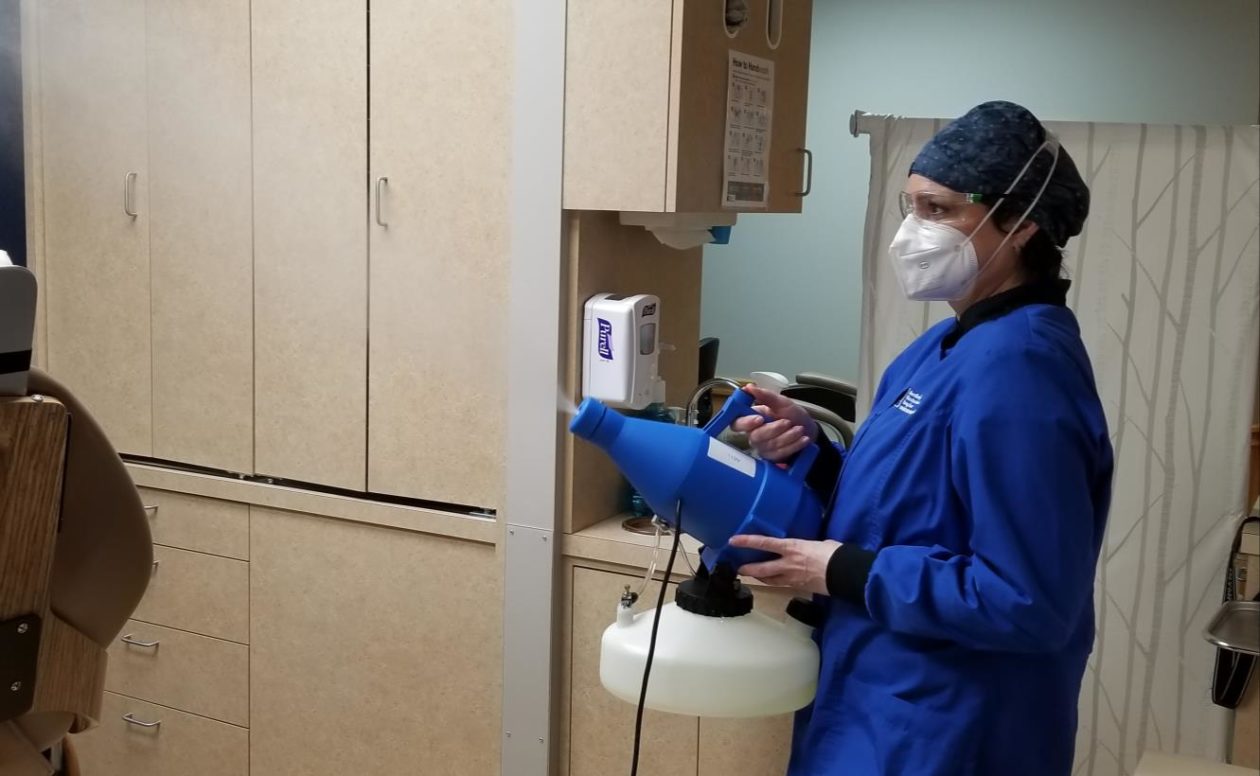
- Use the fogger and electro-biocide solution to clean the entire office at the beginning of the day and as needed.
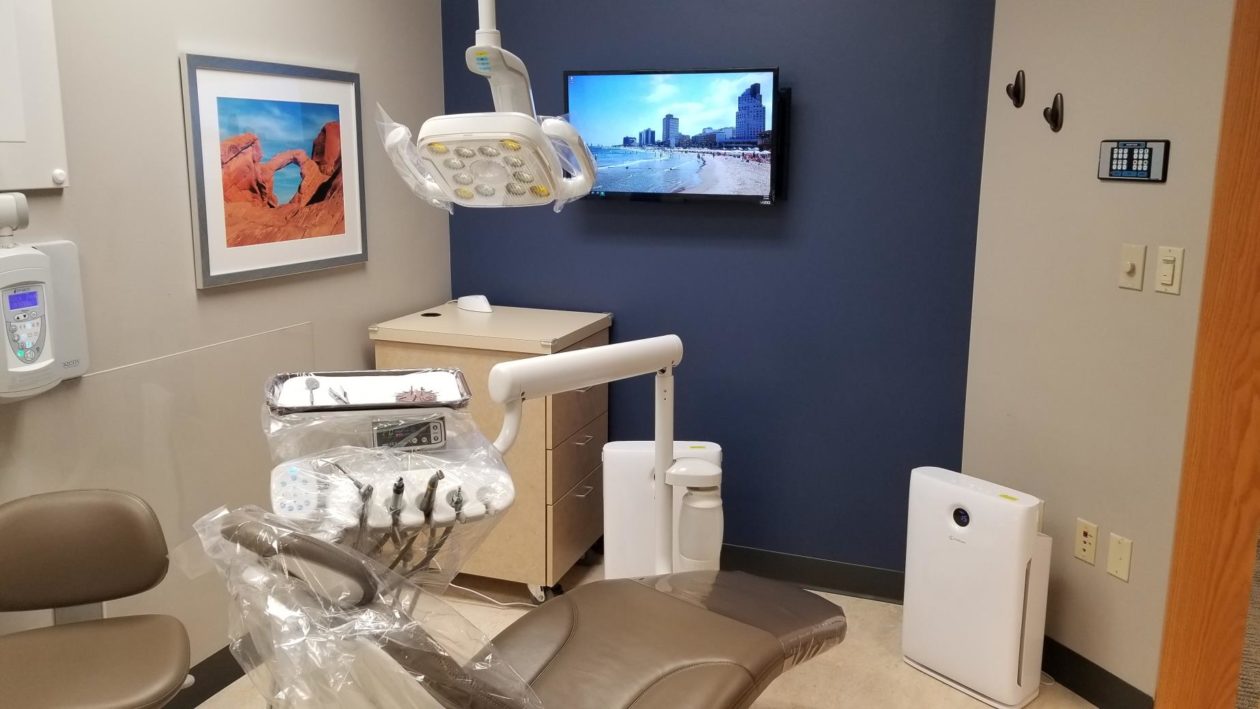
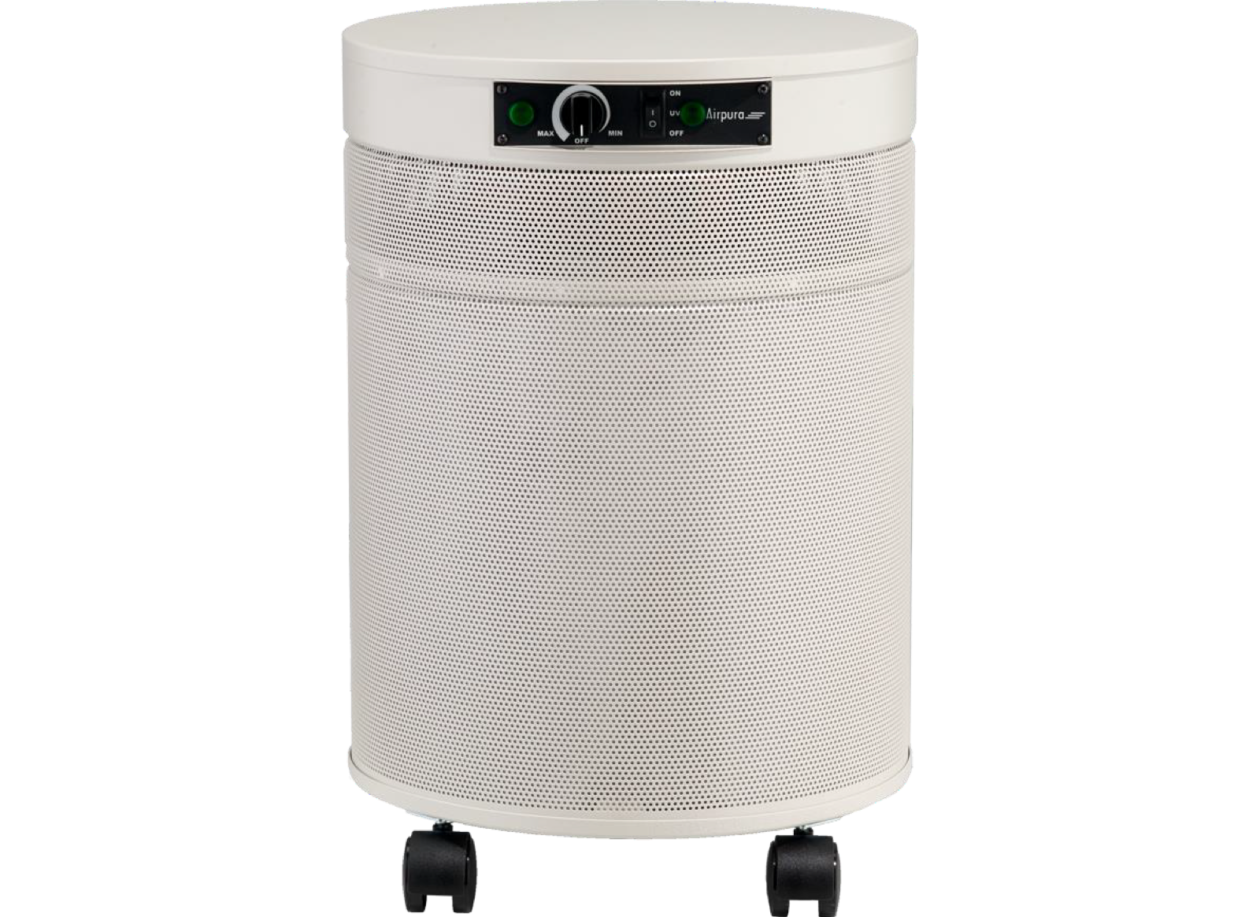
AirPura UV600 with medical grade true HEPA filters and UV-C light. Chemicals, viruses, bacteria, mold, and particles go through four levels of filtration.
Opening sterilization area:
- Wear protective eye wear, mask, face shield and gloves prior to entering sterilization area.
- Turn on the air purifier to the max (ensure UV light is on).
- Put out fresh towels — one on the contaminated instrumentation area; one on the sterile area.
- Rinse thoroughly products in cold sterile, dry and put away.
- Fill ultrasonic and pre-soak.
Closing operatories:
- Empty water reservoir bottle and store upside down.
- Purge lines of excess water.
- Turn off delivery system.
- Turn off composite warmer.
- Restart computer.
- Put patient chair in upright position and raise.
- Shock the lines (once a week).
- Mop floor.
Closing sterilization area:
- Wear protective eye wear, surgical mask, visor with face shield, and gloves.
- Empty ultrasonic and pre-soak. Rinse and spray with disinfection solution.
- Make sure all trays are bagged and ready for sterilization, if not already in autoclave.
- Put away all clean instruments and trays; put towels in laundry.
- Mop floor.
- Use the ULV-fogger and electro-biocide solution to clean the entire office at the end of the day and as needed.
Sterilization and Disinfection Assistant Operatory Duties
At the beginning of the working day (after wellness check):
- Wash hands (WHO guidelines provided at each handwashing station).
- Rinse with mouth wash provided for the designated time recommended by manufacturer.
- Change clothes as needed and place a surgical head cap.
- Replace shoes/place shoe covers.
- Wash hands (WHO guidelines provided at each handwashing station).
- Place a KN95/ N95 mask and protective eyewear for the day.
Breaking down and setting up operatories:
- Wait for 15 minutes after the patient has been discharged prior to entering the operatory.
- Wash hands (WHO guidelines provided at each handwashing station).
- Place contaminated lab coats and towels in laundry bin, start wash if you have a load ready.
- Discard any disposables in the trash receptacle.
- Discard sharps (e.g., needles, carpules, blades, sutures, wedges, metal matrices, etch applicator tips) in the provided sharps container in the room.
- Wipe the contaminated surfaces in the operatory with pre-moistened wipe, discard the wipe, and wipe the cleaned surface with a new unused wipes (wipe counter and all contaminated instruments used during procedure, hoses, drawer handles and knobs, faucet handles, patient chair, procedure light switch, and the assistant’s and doctor’s chairs including levers that raise and lower the chairs). Place all instruments to be sterilized on the tray and take to the holding area in the sterilization room.
- Discard gloves and wash hands.
- Clean assistant’s and doctor’s face shields and wash hands again.
- Place chair cover over patient chair and delivery system.
- Place cover over light handles, air water syringes, and suctions.
- Place fresh doctor and assistant or hygienist lab coats in operatory.
- Set up room for next procedure as needed.
Other responsibilities:
- Stock rooms.
- Be available to help chairside assistant and hygienist.
- Laundry needs to be constantly going when possible and all lab coats ready for the next patient/next day as needed.
- Shadow outside venders so you can properly disinfect behind them.
Chairside Assistant Protocol
At the beginning of the working day (after wellness check):
- Wash hands (WHO guidelines provided at each handwashing station).
- Rinse with mouth wash provided for the designated time recommended by manufacturer.
- Change clothes as needed and place a surgical head cap.
- Replace shoes/place shoe covers.
- Wash hands (WHO guidelines provided at each handwashing station).
- Place a KN95/ N95 mask and protective eyewear for the day.
Prior to patient treatment:
- Wash hands (WHO guidelines provided at each handwashing station).
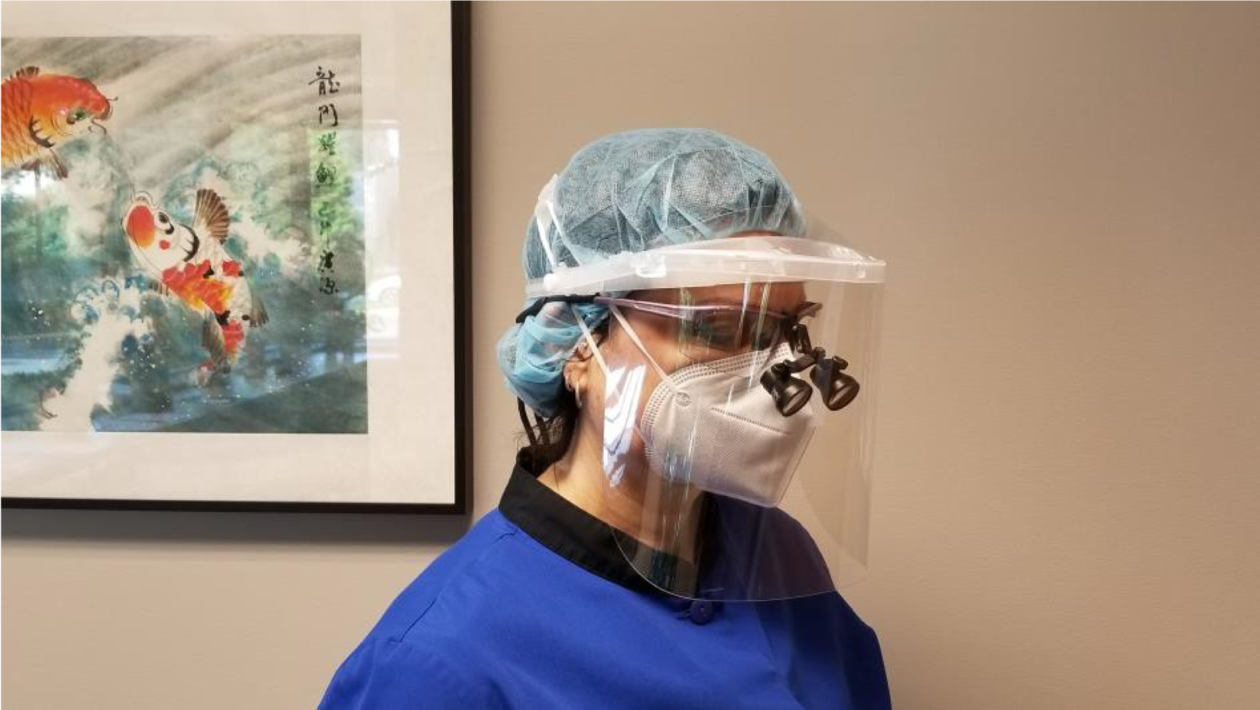
- Don gown/lab coat, surgical mask (place over provided N95/KN95), protective eyewear and visor with face shield. Wash hands then don gloves (CDC donning/doffing guidelines provided in staff entrance area).
- Place bib on patient and give protective eyewear.
- Have patient remove their mask.
- Have patient rinse with mouthwash (rinsing duration to be specified by the manufacturer).
- Go over new HVE and ventilation system and all steps taken in the office to protect the patient and team with the patient prior to treatment.
After patient treatment:
- Use Messenger to alert front office the patient is coming up and what the next treatment is. Include any other notes the front office needs to know, such as unable to walk out, all is as planned or added treatment, etc.
- Direct patient to walk to the front desk.
- Remove PPE (except KN95/N95): remove gloves and gown and then wash hands; remove face shield and protective eyewear, followed by the surgical mask. Discard disposable PPE.
- Place PPE that needs to be washed on the patient chair, such as lab coats and towels.
- Wash hands, clean visor, and wash hands again.
- Move to next operatory and verify set up (including air purifiers on) and prepare to receive patient. (Sterilization and disinfectant assistant to set up as much as possible.)
Hygiene Patient Treatment Protocol
At the beginning of the working day (after wellness check):
- Wash hands (WHO guidelines provided at each handwashing station).
- Rinse with mouth wash provided for the designated time recommended by manufacturer.
- Change clothes as needed and place a surgical head cap.
- Replace shoes/place shoe covers.
- Wash hands (WHO guidelines provided at each handwashing station).
- Place a KN95/ N95 mask and protective eyewear for the day.
Prior to patient treatment:
- Wash hands (per WHO guidelines provided at each handwashing station).
- Don appropriate gloves, surgical mask (over N95/KN95), lab coat, and protective eyewear and visor with face shield. (CDC donning/doffing protocol provided in staff entrance area).
- Place bib on patient and give protective eyewear.
- Have patient remove mask.
- Patient is to rinse with mouthwash (rinsing duration to be specified by the manufacturer).
- Discuss new HVE and ventilation system and all steps taken in the office to protect the patient and team with the patient prior to treatment.
- Do not combine the use of air/water syringes since it will generate aerosol spray.
- Use hand instrumentation only. Do not use ultrasonic instruments for periodontal debridement and scaling procedures at this time.
- Do not use a polisher at this time.
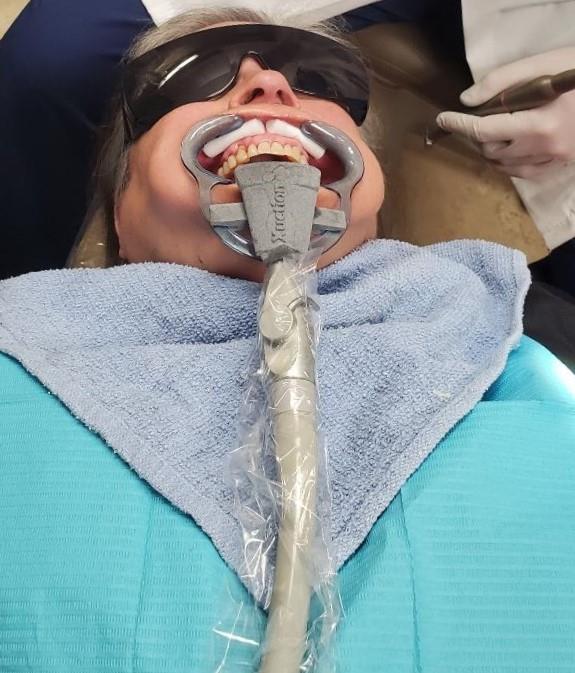
- Use HVE suction to reduce aerosols and splatters.
- Use selective plaque and stain removal versus full-mouth coronal polishing.
- Avoid aerosol production as much as possible.
After patient treatment:
- Use Messenger to alert front office the patient is coming up and what the next treatment is. Include any other notes the front office needs to know, such as unable to walk out, all is as planned or added treatment, etc.
- Preschedule your patients from the operatory prior to the patient leaving if the patient wishes to do so.
- Direct patient to walk to the front desk.
- Remove PPE (except KN95/N95): remove gloves then gown then wash hands; remove face shield and protective eyewear then surgical mask. Discard disposable PPE.
- Place PPE that needs to be washed on the patient chair, such as lab coats and towels. (Sterilization and disinfectant assistant will pick up and wash the items.)
- Wash hands, clean visor, and wash hands again.
- Move to next operatory and verify set up (including working air purifiers).
Doctor Hygiene Exam Protocol
The need for a patient exam during hygiene treatment will be determined at this point based on patient’s health and needs. The purpose is to ensure social distancing and minimize use of PPE.
In clinical scenarios where the hygienist suspects oral health concerns/oral disease during hygiene patient care, they will alert the front office via Messenger that the patient needs an oral exam.
Subsequently, the front office will alert the doctor and the sterilization and disinfection assistant.
The sterilization and disinfection assistant will prepare two more lab coats and face shields so the doctor will have a new coat for the hygiene exam and a new coat for when returning to their patient.
Please try not to exceed two exams per doctor per day/shift.
Doctor Protocol
At the beginning of the working day (after wellness check):
- Wash hands (WHO guidelines provided at each handwashing station).
- Rinse with mouth wash provided for the designated time recommended by manufacturer.
- Change clothes as needed and place a surgical head cap.
- Replace shoes/place shoe covers.
- Wash hands (WHO guidelines provided at each handwashing station).
- Place a KN95/ N95 mask and protective eyewear for the day.
Prior to patient treatment:
- Wash hands (WHO guidelines provided at each handwashing station).
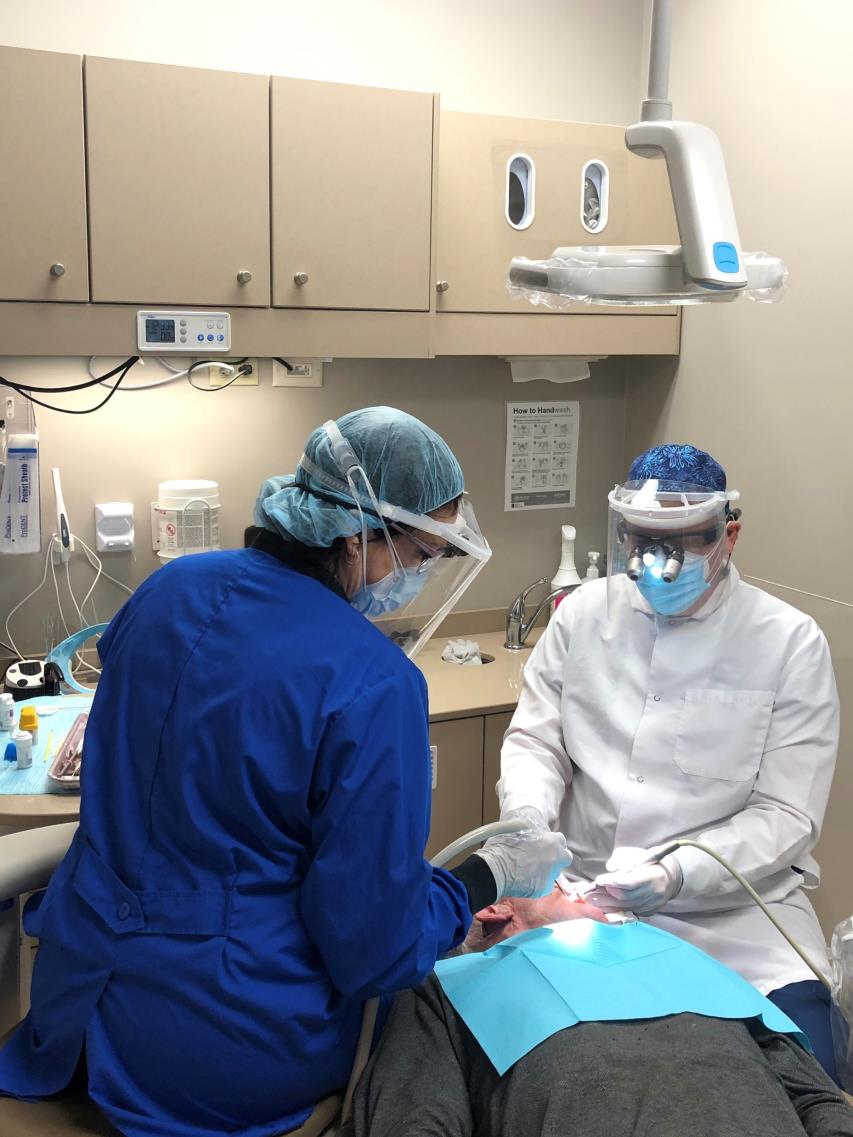
- Don gown/lab coat, surgical mask (place over provided N95/KN95), protective eyewear/loops and visor with face shield.
- Wash hands then don gloves (CDC donning/doffing guidelines provided in staff entrance area).
- Treat patient.
After treatment:
- Remove PPE (except KN95/N95): remove gloves, then gown, then wash hands; remove face shield and protective eyewear, then surgical mask. Discard disposable PPE.
- Place PPE that needs to be washed on the patient chair, such as lab coats and towels.
- Wash hands, clean visor, and wash hands.
- Move to next operatory.